
I built my wife a lightboard for online teaching purposes for the fall semester because covid-19 means she’ll be teaching from home. If you’re coming here from Facebook or Twitter, you’ve already seen how this thing works with Laura’s demo video.
If you’re coming in some other way, your first question is probably what’s a lightboard? It’s a way for a teacher to both face their students and be able to draw on a board so that students can see what the teacher is doing. It works like this:

Either way, a couple of people have asked me to write up the process. So, here goes. First, this isn’t a particularly difficult project and it doesn’t require a lot of tools.
Tools:
Tape measure.
Saw that will cut boards at 90º (I used a power miter saw).
Drill or screwgun.
1 small stepladder
Ear protection (if you’re using a loud saw)
Eye protection (likewise for the saw)
Materials:
I mostly used scrap I had around the house, but I’ll lay this out as though you were buying fresh.
3 Eight foot 2″ x 4″s
3 Eight foot 1″ x “4s
5 Eight foot pieces of quarter-round or similar trim (or ~36 feet total)
1 Four foot 1″ x 12″
1 Large sheet of glass. (I used 3′ x ‘5 plate, but poly or window glass would work)
20 3-1/2″ screws (I used deck screws, but any power driveable screw will do)
50 1-1/4 inch screws (I used a mix of sheetrock and finish screws)
Optional 8 small steel L-brackets.
1 King size black fleece bedspread
1 pint (or spray can) matte black paint
1 Sixteen foot color variable adhesive LED strip light with remote
1 Cell phone tripod mount and remote
1 Cell phone with video capability
1 Blue tooth earpiece
1 Tripod or other camera base (I used a 2″ x 4” hinge-mounted to the ceiling)
4 clamps (holding the backdrop, and screws or binder clips would work too)
1 Set of Neon/Window glass markers (we used EXPO 1752226 Neon Dry Erase Markers)
Construction:
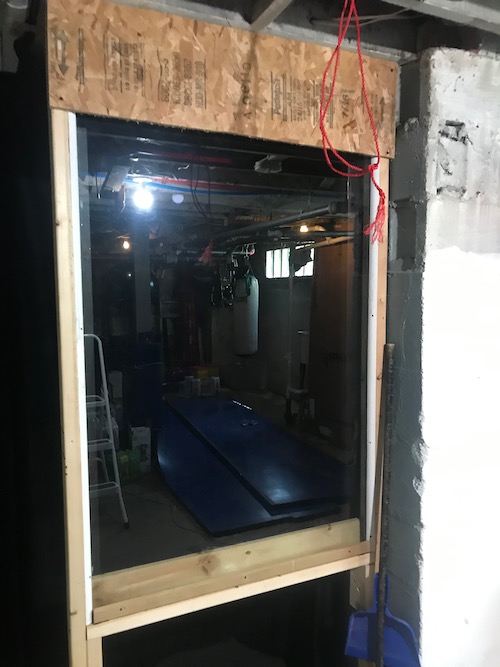
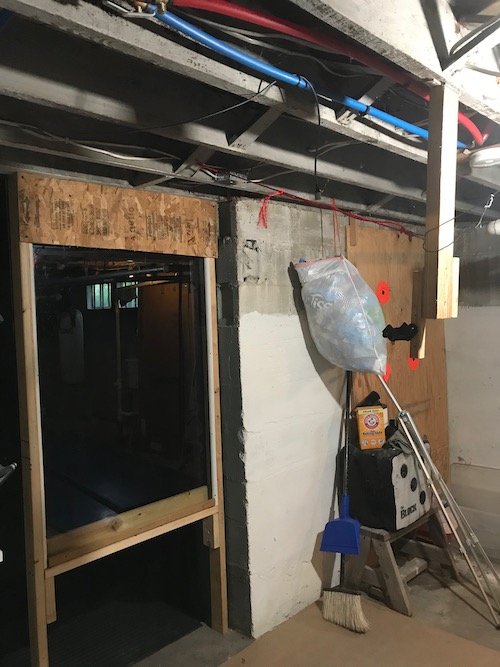
I’ll start with a shot of the end product minus the fancy lighting. Not much to look at, right? What you’re seeing here is a camera side view of the lightboard. As you can see, the basic frame to hold the glass is made of two-by-fours with quarter round holding it in place. the piece of chipboard across the top is there to mask the overhead light that lights Laura while she’s using the lightboard. The red line is part of the system for locking the camera mount in place when it’s not folded up against the ceiling. The board you see bottom back is on the far side of the glass and masks the LED strip so that it doesn’t overlight Laura.
Step One: Find a place in the house where you can put the lightboard up as a permanent fixture and not have it be an impediment to anything else. It needs three to four feet behind the glass to fit the teacher and the light-absorbing black backdrop, and another four to five feet in front to give the camera enough space. It also has to be a room that can be made very dark. In our case that meant the basement under our back stairs.
Step Two: Measure the distance between the floor and the ceiling so you can cut the vertical two-by-fours to the right length. In our case, that meant slightly longer than the height between the floor and the overhead joists so that I could screw through the joists to attach the top ends. I used pressure to hold the base in place, because it’s concrete and so is the wall. If I were mounting this in an upstairs room, I’d have hard mounted one of the verticals to a wall stud.
Step Three: Cut the two-by-fours to length. Vertical length was determined by the height of the ceiling as noted above. Horizontal length came from the size of the glass sheet. In our case that was three by five feet, so the horizontal cut was three feet. Materials shots below.
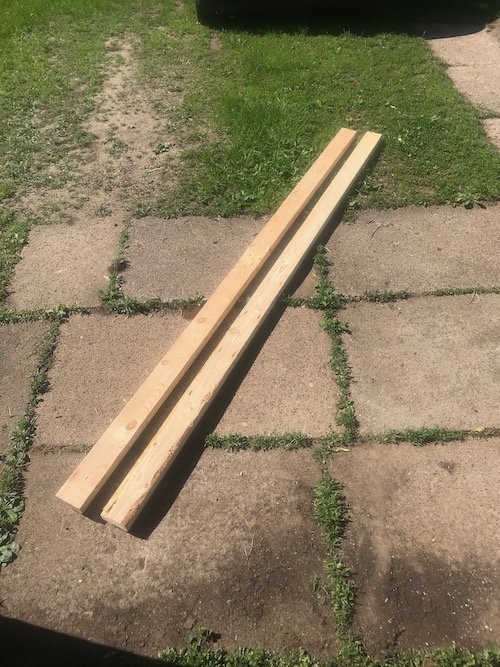
Two-by-fours salvaged from an old platform someone threw out.
Glass sheet (from a long ago project)
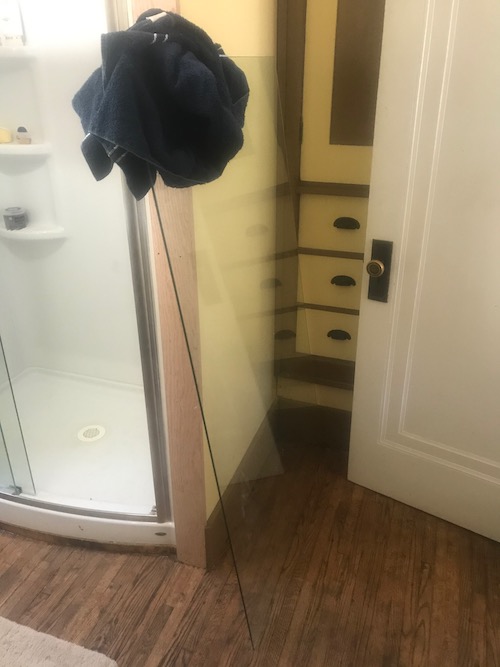
Salvaged 2″x 4″ + quarter-round trim salvaged from bathoom gut-out.

Step Four: Assemble the basic two-by-four framework. I did this on our back deck where I could lay things out flat and create an opening of the right size to fit the glass with right angle corners as perfect as I could make them. The glass has basically zero tolerance for any variability in the frame, so I gave myself an extra 1/16th of an inch vertically and horizontally beyond the basic size of the glass to give me a little slop to account for the frame boards not being perfectly straight. I used three heavy screws at each corner to make it tough. I also left the bottom corner on the side away from the wall only partly screwed in because I thought the glass might not slot in perfectly (it didn’t and I had to open it when we put the glass in place and then close it again once we had it set).
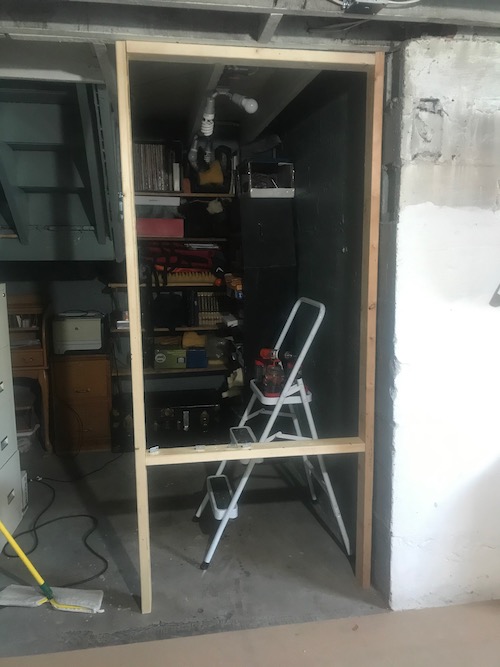
Frame in place but without any mounting hardware.
Step Five: Mounting hardware. I chose to put four small L-brackets in place at the corners in order to backstop the glass as I was putting it in. This isn’t necessary, because you can achieve the same effect by simply screwing the quarter-round in place on the camera side of the glass. In either case, the camera side mounts should be placed so that the glass will sit about 3/4 of an inch from the camera side edge of the two-by-four frame because you need space on the back for the lighting system. I used one inch quarter round lengths trimmed to fit with a simple square join because I had salvage wood and didn’t want to do fancier joins, but you could easily use shorter pieces if you’ve got them. The quarter round serves a dual purpose in that it both holds the glass in place and masks the lights so they don’t dazzle the camera.
Frame with L-brackets top and bottom.

Step Six: Putting the glass in. This is ideally a two person job, especially if you’re using a large piece of plate glass, like I did. In a perfect world you pick up the glass, set the bottom on top of the bottom board, slide it tight against the brackets or quarter round, and then tip the top in and get your second person to hold it in place while you mount the back quarter round. The most important thing to remember here is to not hit the glass with the screws for the quarter-round. Also, this is why I used screws rather than finish nails. I also installed a couple of two-by-four supports on the inside of the verticals under the frame proper because I always over engineer.
Glass in place between quarter-round layers, plus bits for later.
Glass up, and extra supports in place, but nothing else done yet.
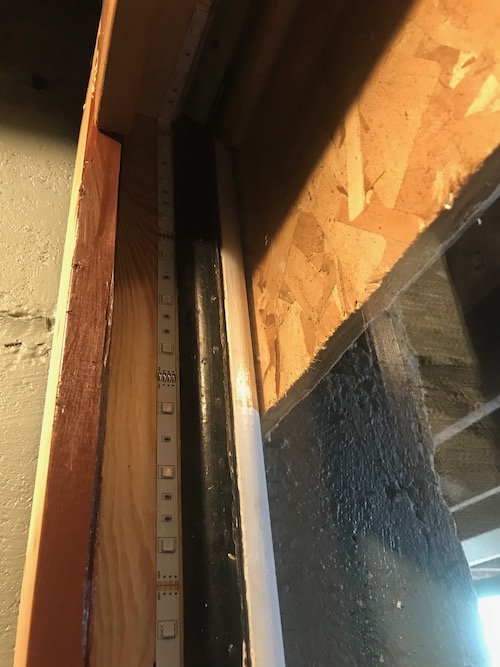
Step Seven: Lights. We used these LED Strip Lights with Remote from Amazon for $17.99. It’s a 16.4 foot strip with adhesive backing. I very carefully attached the plug-in end at the top and unrolled it around the inner surface of the glass frame on the backdrop side immediately adjacent to the quarter-round. I also put an extra screwed down anchor at the plug in end to support the weight of the plug and cord to keep it from coming unstuck. When I did that I was very careful to NOT drill through the LED strip.
The LEDs are the strip of white to the left of the black quarter-round.
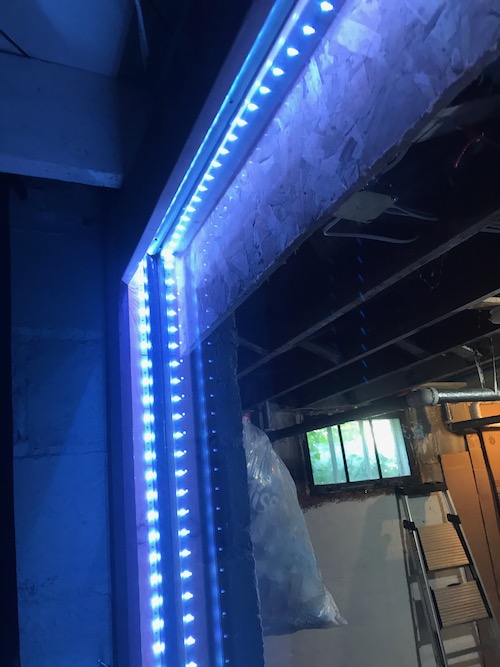
This is how it looks lit.
Step Eight: Back masking. It turns out the LEDs put out a lot of light that hits the backdrop area and makes it harder to see the lightboard drawings, so I needed to put up extra masking to help keep the light from the LEDs in the plane of the glass. I used one-by-four boards attached to the outside of the two-by-four glass frame as seen below. I cut six footers down to the exact size of the frame, but you could easily use shorter scrap boards.
One-by-four masking boards left over from some previous project.
Lights on, backdrop up, but only partially masked.

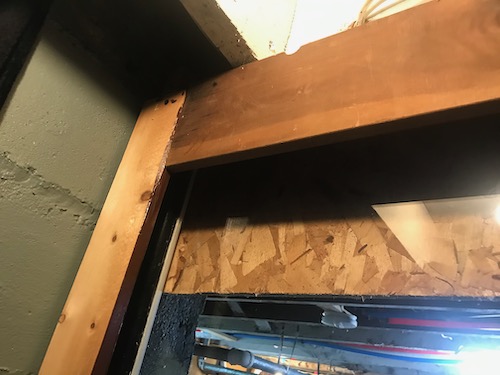
Step Nine: Front masking. With the masking that keeps the LEDs in the plane of the glass, they don’t put out quite enough light to show the user properly, so we are using an overhead fixture that was already in place at the beginning of the process for that. However, in order to keep it from dazzling the camera we needed a little extra front masking. I used a piece of chipboard scrap as seen in the picture immediately below. It’s 3′ 3″ long by 11″ wide, and would be replaced by the one-by-twelve listed in the materials list if you were buying new. It’s screwed directly to the camera side of the two-by-four frame.
Front masking.
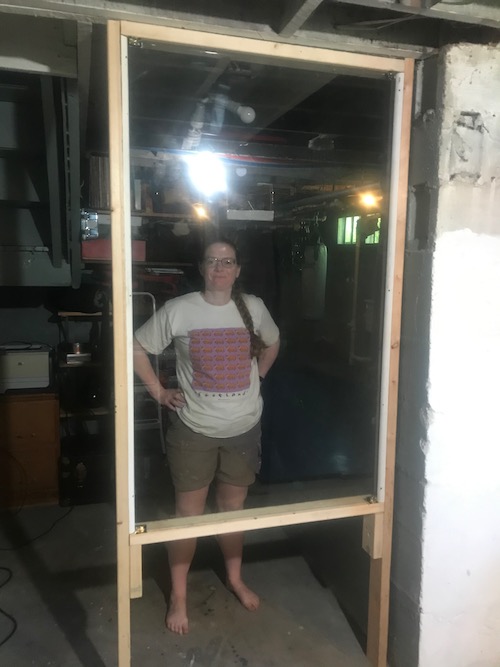
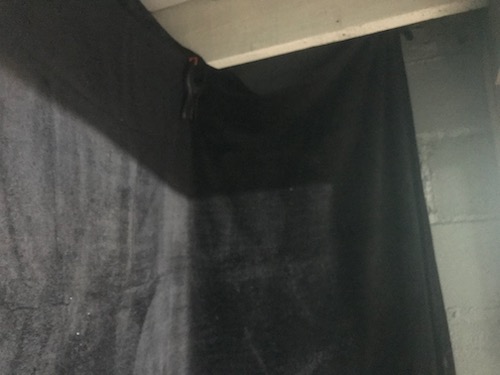
Step Ten: Backdrop. We used a king-sized fleece bed cover, because the combination of texture and size was perfect for absorbing light and because it was cheap (27.99) at Amazon. Flannel Fleece Plush King. To mount it I just grabbed a couple of pressure clamps from my workroom and clipped them to the joists, but I will use screws with large washers or binder clips screwed into the joists to replace them. If I were doing this in a room with a ceiling, I’d start by putting up the binder clips and then clipping them in place. As you can see from the picture, I’ve got the backdrop mounted so that it creates a box around the user with fleece on three side and the lightboard on the fourth.
Fleece blanket backdrop from Amazon
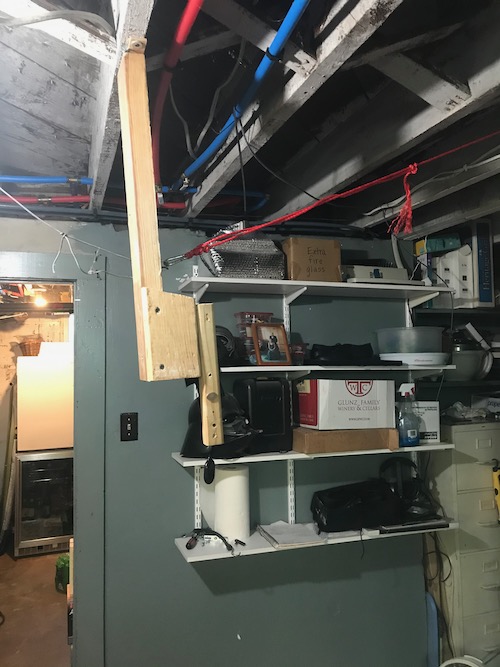
Step Ten A: Camera mount part one. This is a serious kludge. I hinge mounted a piece of two-by-four to an overhead joist because we needed to be able to fold the mount out of the way when not in use. And then I had to add a couple of pieces of board to get the camera to sit at the right focal point since that was between joists. If it didn’t need to move it would have been much simpler. I would have put a board across between the joists, screwed a vertical piece cut to the exact length I needed and been done with it.
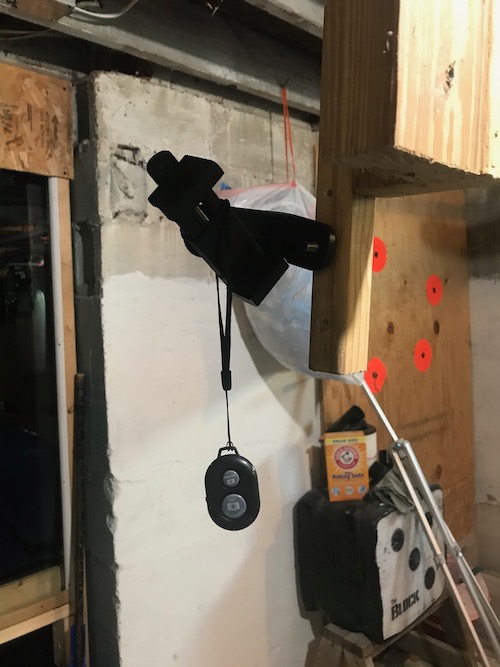
Step Ten B: Camera mount part 2. I drilled a hole through the piece of two-by-two and mounted a machine screw that is the size of a standard camera tripod base. With that in place it’s simple enough to screw a cell phone camera mount onto the base. You could also simply use a tripod if you had one around. The cell phone base was another cheap amazon purchase at $13.95. We used this one because it came with a remote.
That’s pretty much it. Laura records the video with her cell phone using a blu tooth earpiece as a microphone, and then flips it before posting.
One final note: This is not a difficult project, though it took a lot of fine tuning one the lighting and masking. I am a handy sort of individual with a good bit of construction experience since, but anyone with a saw, a screwgun, the materials, and a bit of can probably manage it.